How to live stream on AWS

Are you tired of evaluating streaming providers and always getting stymied by a critical disadvantage of some sort? Are you a fan of cloudy days? Does your risk tolerance extend to nebulous and potentially-vast cloud usage charges with practically no upper bound?

Then boy, have I got a how-to for you!

Here’s a rough picture of the setup we’ll end up with:

And here’s a textual rundown of what we’re going to need:

  • An encoder. I use OBS.
  • An AWS Elemental MediaLive instance.
  • An AWS Elemental MediaPackage instance.
  • An AWS CloudFront distribution. (MediaPackage takes care of this for us.)
  • A client-side video player. (We’ll use VideoJS.)

This guide will walk you through all of these except the first: I am going to assume you’re already familiar with OBS (or some other encoder). If not, you’ll want to find a guide and do some reading on that before you dive into this.

I currently use this setup to live stream worship services at Grace URC. We stream at 720p, 2500Kbps upload bitrate, and we have MediaLive configured to rebroadcast to YouTube Live.

One thing to note is that I’m focused on minimizing costs rather than maximizing redundancy or quality. The steps I use set up a SINGLE_PIPELINE channel in AWS rather than the STANDARD channel class most of the Amazon templates have you create. STANDARD gives you more redundancy via dual input pipelines, but I’m not equipped to take advantage of this. Besides that, if you need high-availability, you shouldn’t be learning how to do this from my walkthrough. I profess no expertise here; I’m just sharing what I’ve learned by stumbling through it.

Serious disclaimer: AWS costs money. In my experience streaming 720p to a modest audience of 60-70 viewers, you should budget something a little under $10/hour for this setup. If you forget to stop your AWS channel, it’ll continue to rack up a few bucks an hour, presumably indefinitely. I like to set up budget warnings in AWS Cost Explorer to notify me of any craziness going on.

Onward to live streaming!

Step 1: Create MediaPackage instance

MediaPackage is the part of the machine that takes the numerous streams of varying resolutions and bitrates from MediaLive and packages them all together into a single HLS manifest for clients to consume. The end result of this will be that you get a URL ending in .m3u8 which you can feed to a client player like VideoJS on your website.

  1. Go to your AWS console.
  2. In the “Find services” search box, type mediapackage and click on the MediaPackage service.
  3. Under Channels, click Create.
  4. Enter an ID you’ll remember (we’ll use this later).
  5. For Input Type, choose Apple HLS.
  6. Check the radiobutton to “Create a CloudFront distribution for this channel”. (This is technically optional, but as of this writing, network egress from CloudFront costs the same as egress from MediaPackage and the transfer from MediaPackage to CloudFront is free, so I figure why not have a CDN?)
  7. Click “Create”.

Step 2: Create MediaLive instance

  1. Go to your AWS console.
  2. In the “Find services” search box, type medialive and click on the MediaLive service.
  3. Click the orange “Create Channel” button.
  4. Find the section on the page which says “Select custom template”.

At this point, you need a template file to upload. Here’s the template I’ve been using (with a few sensitive details stripped out). You’ll need to replace YOUR-MEDIAPACKAGE-CHANNEL-ID-HERE with the MediaPackage channel ID you set above and YOUR-YOUTUBE-STREAM-KEY-HERE with the stream key for the YouTube Live stream you want to rebroadcast to. (If you don’t want to do that, you can remove the YouTube output entirely after you import the template.)

If all went well, most of the fields you need should be filled in. The output groups panel on the left should look something like this:

At this point, if you’re not planning to stream to YouTube Live, click the “YouTube Live (RTMP)” output and then click the Remove button in the upper right.

Now that the template is added, there are just a couple more things to do before creating the channel.

  1. Next to “Input Attachments”, click “Add”.
  2. In the upper right next to “Attach Input”, click the “Create Input” button.
  3. Enter a name for the input (I usually put “rtmp ingest” here, but this can be anything).
  4. Select “RTMP (push)” from the list.
  5. Leave “Network Mode” as “Public”.
  6. Under “Input Security Group”, select “Create”.
  7. Look up your public-facing IP address.
  8. In the “CIDR-formatted strings” box, enter your public IP address followed by /32. For example, if your IP was 1.2.3.4, you would enter 1.2.3.4/32. This is a security measure making it so only your IP address can connect to this input.
  9. Click “Create input security group”.
  10. Under “Input Destinations”, select the channel class “SINGLE_PIPELINE”.
  11. Under “Destination A”, enter an application name and instance. The application name will be appended to the RTMP server URL you’re going to put into OBS. The “application instance” is going to be the stream key you put into OBS.
  12. Click Create.
  13. Back at the channel, select the input you just created, then click “Confirm” to attach it to the channel.
  14. Scroll down to the section which says “Audio selectors” on the newly-attached input settings.
  15. Click “Add audio selector”.
  16. Give it a name (I use “default”). Leave “Selector settings” blank.
  17. On the left, click “Create Channel”.

Step 3: Start the channel

At this point, you have an input and a channel. In the MediaLive control panel, on the left if you click “Inputs”, you should see your input listed with a rtmp:// address under “Destination A” on the right. That’s the URL you’ll put into OBS as the stream URL, all except the last part (the part you entered for “application instance” – strip that off the URL and instead put that last part into “stream key” in OBS.

If you click “Channels”, you’ll see your new channel listed as Idle. To start streaming, select the channel and click “Start”. It will take a few moments to start up. Once it’s ready, after you configure OBS with the RTMP input’s stream URL, you can start streaming.

Step 4: Get the CloudFront HLS URL

Go to the AWS MediaPackage service and select your MediaPackage instance from the list (it’s probably the only one). Click on it to view the details.

In the “Endpoints” section, you should have one endpoint listed. On the right there’s a link which says “Show CloudFront URL”. Copy that URL – it’s the one we want to give VideoJS.

Step 5: Set up the VideoJS player

Now on your website you need to add the VideoJS player. Here’s a basic example:

Replace YOUR-HLS-URL-HERE.m3u8 with the CloudFront URL you copied above.

Teardown

Cloud resources cost money! Don’t forget to stop your MediaLive channel when you’re done streaming. When the channel is stopped, both it and the RTMP input each cost $0.01/hour as idle resources. For my purposes, I usually delete the input and channel since I only stream once a week. To do this, you must first stop and delete the MediaLive channel, and then delete the input (it won’t let you delete the input while it’s attached to the channel).

I leave the MediaPackage and CloudFront resources in place because they are not charged the idle fee (as of this writing).

These AWS services have a lot of configuration options I’ve left out here (and I’m not qualified to talk about most of them), but this walkthrough should get you set up with a decent 720p channel.

A Review of Livestream Service Providers

Four months ago, when it came to live streaming events, I knew about Twitch.tv and YouTube Live, and that was about it. It was about that time that my church, which is not exactly multimedia-savvy, suddenly had the need to live stream services because we were no longer allowed to meet in person due to the threat of COVID-19.

Among these two providers I was familiar with, when it came to streaming Sunday worship services, Twitch.tv was automatically disqualified for what are hopefully obvious reasons. YouTube Live was an option (and many churches use it), but I preferred to avoid it because of the automatic video/channel recommendations that we, as the streamer, have no control over.

And so my quest began, the quest for the perfect streaming platform.

Open Streaming Platform

I started the adventure off right by setting up a VPS at DigitalOcean and installing Open Streaming Platform. OSP is more of a DIY streaming provider, designed as a platform where you can host multiple channels with user accounts, chat, VODs, and the works all built in.

This solution actually worked pretty well. OSP supports transcoding the stream server-side into multiple bitrates for different client network speeds, though this does take significant CPU power. The main limitation I ran into with OSP was not related to the software at all but rather outbound network throughput on the server side. This being very early in my streaming adventures, I hadn’t done the proper math yet and realized that 90 viewers * 3500Kbps == 315Mbps, which is above what a DigitalOcean VPS is designed to sustain. This led to some users reporting choppy streams. (After I realized what was going on, I did some searching and discovered that DigitalOcean expects you to limit sustained network use to 300Mbps. Oops!)

If you have a high-throughput connection capable of sustaining your audience, OSP works well and isn’t too hard to set up, assuming you have basic familiarity with Linux servers and nginx configuration. Even though in retrospect I think I could have streamed at lower bitrates and sneaked under the bandwidth limitations (we currently stream at 2500Kbps), it would have remained close.

Pros

  • It’s free (besides server costs and your time)
  • It has a nice admin UI
  • There are a wide variety of features built-in
  • The player works well

Cons

  • OSP completely froze once, fortunately just after the stream content ended. It required a server reboot to get running again. I’m not sure what happened.
  • You need a server with high network throughput to stream to many users. Renting a server built for this sort of thing can easily run into the hundreds of dollars a month.

Boxcast

The next streaming provider I tried was Boxcast. They offered a two-week trial, so I ended up using Boxcast for four total services. In all but one, it worked flawlessly, but in the last service, about 10 minutes before the end the RTMP ingest server started choking. We went from a solid 2500Kbps upload to 500-800Kbps, which was enough degradation for people to start getting choppy streams again. Immediately after the service ended, I closed down the stream and did a speed test as well as a brief test using YouTube Live, all of which worked flawlessly. So I think something happened either on Boxcast’s ingest server or on the network between me and it.

Normally I would have followed up with Boxcast’s support (which appears to be excellent), but I didn’t because the other major problem with Boxcast is their annual commitment. My church will probably keep on streaming services after the COVID lockdowns end, but it’s probably going to be to only a handful of users. An annual commitment of $100 a month is steep for a small church to stream to just a few users.

Pros

  • Clean interface, easy to set up events
  • Excellent player (appears to use the open source VideoJS player)
  • Also offers out-of-the-box streaming with custom encoder hardware, if you’re big enough to want that sort of thing

Cons

  • The streaming admin interface made me slightly uncomfortable. There’s a mysterious delay when you start an event (I now suspect this is while they spin up cloud resources in the background). Also, the interface left some questions in my mind about what would happen if my internet connection dropped and then I tried to reconnect – would the event automatically end? Overall, I would have liked more “manual control” over stream start, end, and the corresponding embed URL.
  • The ingest server had that spot of bad performance. It didn’t die completely, but upload was slow. And related to the above issue, I wasn’t sure if I could stop and restart the event to try to fix it without all my users having to refresh the page (or me having to embed a new player URL).

Despite the cons, I probably would have signed up for Boxcast if I could have justified the cost and commitment.

YouTube Live

So how about that YouTube Live! Wanting a solution that would “just work” and get our church through this turbulent streaming adventure, I decided to try a couple of services with YouTube Live and just put up with the potential for ads and channel recommendations. (Maybe just channel recommendations. I’m still not sure whether YouTube will ever insert pre-roll or post-roll ads without your permission, and that despite searching all over for the answer.)

YouTube Live’s admin interface is far and away the best of the options I tried. It’s easy to set up a stream, and you have manual control over whether to start and stop it. The player is best-in-class. Right?

For some reason, numerous congregants on various browsers reported serious audio sync issues. (We’re talking audio being out of sync with video by up to 10 seconds.) This persisted for them even through reloading the page. I’m reasonably sure it wasn’t a problem on my end, because it worked fine for lots of other users, and the recording later on YouTube was all in sync. I have no idea what went wrong here, but it happened two weeks in a row for these folks. And here I thought YouTube was the gold standard for video players.

Pros

  • It’s “free”, if you don’t value your (and your viewers’) personal data
  • The admin interface is excellent

Cons

  • Bizarre audio sync issue which is literally impossible to troubleshoot because Google support doesn’t exist unless you are either a famous social media celebrity or paying them five figures a month (and sometimes not even then)
  • Post-roll channel recommendations tend to reduce the degree of reverence which ought to go with a worship service to the Triune God
  • There’s literally no way to pay money to get a white-label experience

Vimeo

A while back, Vimeo bought out Livestream to add to its video platform. At $75/month, the Premium membership includes this livestream functionality, so I gave that a try too.

Vimeo’s admin interface is just okay. Live streaming is clearly still the redheaded stepchild in the Vimeo ecosystem; parts of the admin UI feel tacked-on and it’s missing some customization functionality that normal videos have.

Furthermore, Vimeo’s player is straight up terrible. In my own testing, the player would just randomly change quality levels every 10 seconds or so, causing a noticeable break (or record-skip repeat) in the video every time. This went away for me if I manually set the quality level to the highest option, but your average user is not going to do that.

Vimeo would be better off if they just threw away their player code entirely and used vanilla VideoJS instead. In fact, that’s exactly what I would have done if Vimeo live streaming provided the option of a static HLS URL for your streams – which they don’t, unless you are an Enterprise user (“How much does it cost? Well, how much do you have?”) and willing to use an API to get at it. No thanks.

Pros

  • Only $75/month (does require annual commitment, though)
  • Vimeo does move bits from your machine to viewers’ machines, if the viewer can manage to get the Vimeo player to work

Cons

  • Vimeo player is absolute pants
  • No option for third-party live stream players if you’re only a “Premium” member

StreamSpot

At this point in the story, we are approximately two months into COVIDmania 2020 and I am getting tired of changing streaming providers every couple of weeks. The thought crosses my mind that Amazon Prime Video sure does a lot of video streaming; surely somewhere in Amazon’s behemoth cloud ecosystem there might be something a software developer like me could cobble together? I hunt around and found some buzzy sorts of words like OTT, Elemental MediaLive, MediaStore, and MediaPackage. I see cost estimates of $700+ per hour for channels serving thousands of users but acknowledgements that costs are “very hard to predict” and can vary greatly based on nebulous things like CloudFront cache hit rates.

Then I find an article somewhere in the bowels of AWS bloggery (I can’t even find it again, sorry) which lists some partners offering live stream services built on the AWS platform. StreamSpot was one.

Right off the bat I’m charmed by StreamSpot’s silly little loading indicator for their website. It took me right back to 2001 with sites doing Flash-based animated “loading” bars. Touching.

This bit of nostalgia aside, I liked the look of StreamSpot’s offering. It was $80 a month, no long term commitment, for 100200 (for the COVIDs!) concurrent viewers. Additional viewers would cost something like $20/100 (don’t quote me) if you exceeded the limit. Interesting pricing model.

Another large benefit is they provide that static HLS endpoint URL, so you don’t have to use their player. This is actually a vital part of their offering, because I could not get their player to work under any circumstances.

Using VideoJS as my player, I got a test stream up and running. I had some issues doing so, because I was still so new to the nuts and bolts of video transport I didn’t know how to load the URL correctly, and I reloaded the player a bunch of times with trial-and-error initialization. Finally, though, it worked. I went back to the StreamSpot admin dashboard.

23 concurrent viewers?

My eyes narrowed. I’m the only one who knows about this test stream at this randomly-generated URL. I close things down and a few minutes later the viewer count goes to 0. I start up a new test stream and, thoroughly suspicious now, I open my player page and refresh the page a dozen or so times.

16 viewers.

And so I closed the browser and that is the last time I set eyes on the StreamSpot admin dashboard. Because what I’ve been telling all my viewers all along is that if something goes wrong with the stream, just refresh the page. If I have a hundred people each refresh the page a couple of times, I’m out 20 or 40 bucks.

Now, here I have to confess something in my nature that I’m not completely proud of: earning my respect is difficult, and losing my respect is both easy and often irrevocable.

For background, I need to point out that the StreamSpot account creation process explicitly asked for my time zone, and I told it the truth. (It’s the only provider who asked for my timezone, as far as I recall.) I did all this experimentation late at night, and by the end of the night had determined the concurrent user counter was going to be a problem for me. However, I was willing to talk to a sales rep, because maybe they only look at average concurrent users or something to smooth out the inadvertent spikes.

On the second day of my StreamSpot trial, at 6:30am, my phone started ringing on the nightstand next to my bed. (I mute all notifications except phone calls at night, just in case somebody actually needs to get through to me in an emergency.) Because of the late night testing, I was not awake until the ringing started. Caller ID said it was somebody from Clinton, LA. I don’t know anybody from Clinton, LA. Dashed spammers. I rolled over and went back to sleep.

Later I discovered my caller from Clinton, LA, left me a voicemail. He was a cheery-sounding chap named “George” (not really) who spent 45 seconds explaining how happy he would be to talk to me about my StreamSpot trial. And just like that, in a flash I knew that concurrent viewer counting logic didn’t matter, because there was no way I was going to pay money to a company who asked me for my timezone and then used it to wake me up in bed with a sales call.

In the voicemail, George promised to email me, but he never did, so I never bothered to offer him a clue. A month later, the day after my trial expired, George called me again, this time at 7:30am. But by that time I no longer had my script memorized to give him a one-sided chewing out for dragging Pacific timezone people out of bed, so instead I ghosted him.

Pros

  • It’s a thin wrapper around AWS Elemental streaming services
  • Static HLS URL for your channel, giving you flexibility to use your own player

Cons

  • Questionable “concurrent user” pricing model
  • Sales calls first thing in the morning are obnoxious and rude

AWS Elemental MediaLive

By now, the little bits of streaming knowledge which had slowly been trickling into my brain over the past several months had built up sufficient momentum that I felt able to tackle the AWS beast. I was tired of dealing with the various streaming provider admin UIs which are probably all just papered over the top of AWS anyway. Might as well go straight to the source!

Setting up the necessary AWS resources to live stream is no simple matter, which is doubtless why businesses like StreamSpot exist. However, if you’re moderately technical, it can be done. I intend to write another, separate blog post with the steps I use to set up our streaming infrastructure each week. (Actually, I intended that to be this blog post, but then I felt like writing some background so people wouldn’t call me crazy for immediately jumping to AWS. You’re still welcome to call me crazy.)

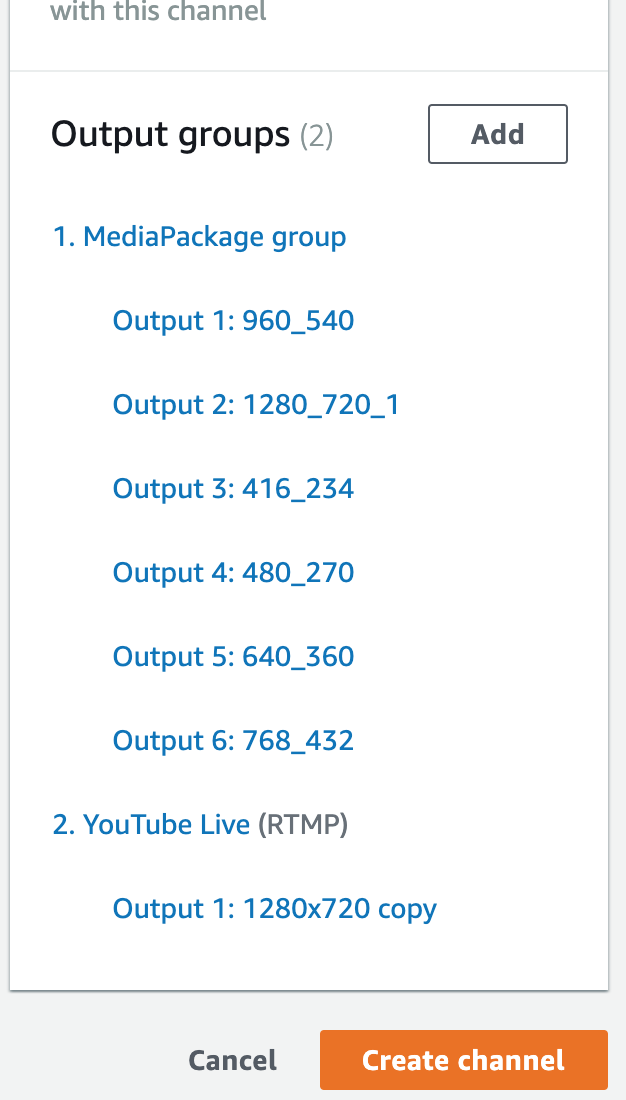
There are approximately 4.7 thousand settings and parameters to configure in AWS, and it feels like any one misstep might bankrupt me with unexpected cloud charges (which is why I have my AWS charges go to a debit card attached to an account with a strictly limited number of dollars in it). In the end, I have one Elemental MediaLive instance with an RTMP push ingest attached to it, and that does the stream transcoding into different resolutions and bitrates. It also forwards the stream on over to YouTube Live, which some of my viewers still prefer for smart TVs, Rokus, and the like. MediaLive pushes bits over to AWS MediaPackage, which puts together an HLS stream and shoves it onto a CloudFront CDN distribution. The CloudFront URL is what I plug into my VideoJS player, and everything works flawlessly.

Pros

  • Total control over the streaming infrastructure, no questionable UIs or abstractions covering things up
  • Static CloudFront URL for the video player
  • Can re-stream to YouTube Live for just the cost of bandwidth (and I’m able to use variable bitrates, so AWS only sends the bits strictly necessary to show the stream)

Cons

  • A real inconvenience to set up each week (unless you’re willing to accept $0.02/hour of idle resource charges throughout the week)
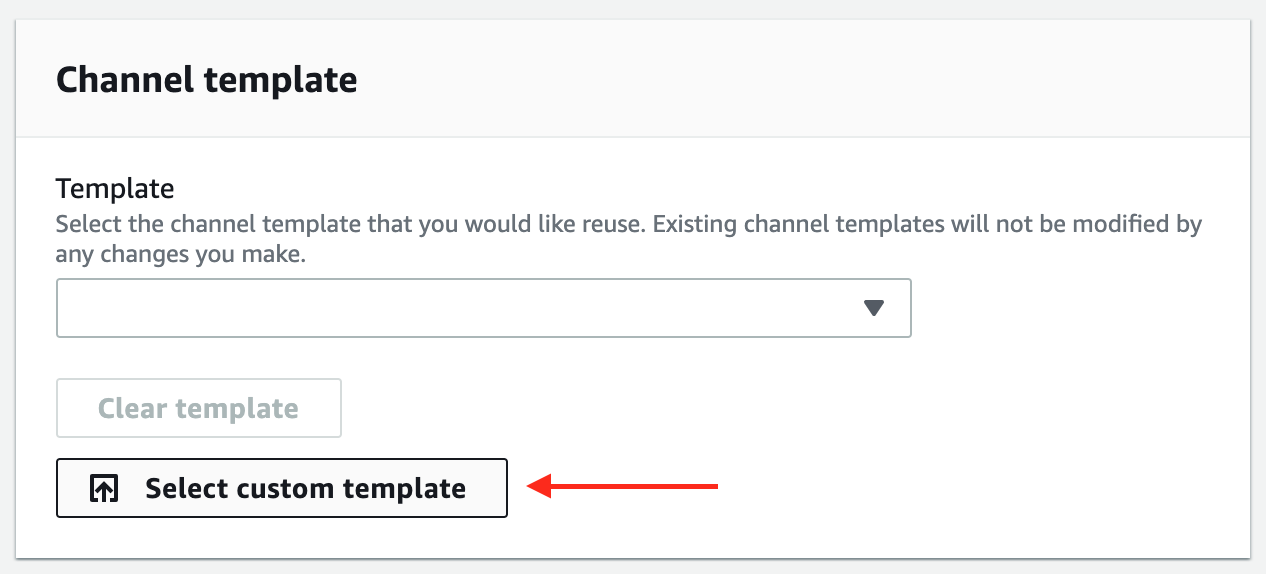
  • Tough to figure out how to get set up the first time (though afterward you can reuse a template to set most of the config options automatically)
  • AWS cost opacity always makes me nervous

Conclusion

I’ve been happy with AWS and VideoJS thus far. We stream at 2500Kbps source bitrate (720p, 30fps) and we transcode that to about 6 different resolutions/bitrates. That plus forwarding to YouTube, with around 60-70 viewers for approximately 2-3 hours each Sunday, costs about $12 per week on AWS – well below any of the other options.

I hope this review has been helpful. Next time, we dive into what’s required to get this AWS setup running.

Experiences with a clover lawn

In my part of the world, clover in the context of lawn care is generally viewed as a noxious weed. People complain about the difficulty in eradicating it from what would otherwise be a beautifully uniform grassy expanse in front of their house. In days of yore, I heartily agreed with this notion, even though I have always viewed clover as one of the less vile specimens of the broadleaf weed category. However, as time marched on, my hostility mellowed. (Or possibly my apathy concerning picture-perfect yards grew and started crowding out clover hostility, there being only limited space in my heart for lawn-care-related feelings.) I began noticing that the clover patches of my lawn tended to be the areas that green up first in the spring and stay green later in the fall. The seed of an idea began germinating in the alkali soil of my mind.

I made the mistake of searching for some images of clover lawns. Done rightly, a clover lawn looks pretty neat! And of course, people tout the drought resistance and nitrogen-fixing properties of clover, both of which might be interpreted as beneficial to the neglectful groundskeeper living in an irrigated desert.

With the dark and ominous backdrop of botanical drama thus set on the horizon, now is a good time for a brief digression to comment on the nature of man. For the past few years, I have tried to get into the habit of doing something interesting each year. One of my perpetual goals is to be an interesting person, the sort of fellow who might tell you a surprising story at the dinner table or at whom you might, on occasion, cock your head to one side as an expression of mild disbelief. To that end, I try to find something notable to accomplish each year. And when, I dare you to answer, was the last time you heard of someone killing off their grass and planting clover instead? This explanation now in place, we return to the narrative.

Naturally (or perhaps “inevitably” is a better word), I decided that 2018 was the year of the Cloverpocalypse. The patchy backyard lawn’s days were numbered, doomed to be spent in quivering anticipation of the coming rototiller, that great equalizer of all landscaping.

A slight wrinkle in my grand scheme seemed imminent when my sister-in-law decided that said backyard – viz., mine – would be ideal to host her outdoor wedding in late June, but I am moderately proud to say that even this bold play did not deter me from my wild plan. I made my dogged intentions clear to the couple-to-be while thinking to myself that as a side benefit, this might deter them from what I considered to be their wild plan of having an outdoor wedding in my yard. However, they were not to be fazed, and as they say in poker tournaments, the stakes were raised.

The following months became somewhat blended together in my mind. Six days a week did I labor, and on the seventh I ached. I developed a sort of routine which I imagine to be the inverse of the Benedictine monk: getting up in the morning, spending a day at brain-labor, then rototilling, sifting old grass clumps out of the dirt, and levelling ground until darkness fell, at which point I ate dinner and went to bed. Somewhere around March, I believe, I seeded clover. Then, in a moment of weakness which brings me shame to recall, I seeded grass over the clover in mid-to-late April, because it became evident the clover was not going to fill in fast enough to supply a wedding-like turf by late June.

It was in these days of late spring that I began experimenting with mowing clover. This is when I discovered that the clover lawns they show you in the pictures have definitely not been mowed recently, or perhaps ever, because a mowed clover lawn is ugly. It is particularly ugly about two days after mowing, because the clover stalks like to compress themselves beneath the front wheels of the lawnmower, so it is literally impossible to get an even cut. By mow-day-plus-two, the tire tracks have sprung back up to a height above the rest of the cut clover and it’s all just kind of ragged. If you want to get anywhere close to an even surface, you must mow at least twice, in different directions, and preferably with a raking in between.

Additionally, if you have any grass whatsoever amongst your clover (and I found turf grasses coming up which I did not even plant), you will find that it grows much more quickly than clover and so about five days after mowing, right when the clover is starting to even out again, you’ll get a whole bunch of little grass stalks raggedly pointing up above the clover field. This also is not what they show in the pictures of beautiful clover lawns.

Thus we confidently state the first great disadvantage of clover lawns: they must be mowed, and mowing makes them hideous. I speculate that this is not problem if you seed not a “lawn” but a “deer forage”. However, my city neighborhood has no deer. Skunks, yes; deer, no, and therefore lawnmowers are indicated.

(For the record, yes, I did experiment with not mowing at all, but clover will grow to 6-8 inches high or sometimes even more, and that’s too tall for a yard that kids play in.)

The second great disadvantage of clover lawns is that clover is, as classified by the bigots, a broadleaf weed. This means it is susceptible to those magical potions which the chemical engineers sell us via promises to rid our lawns of broadleaf weeds while keeping our grass wholly intact. Most people don’t face a moral quandary here because they paint clover with the same broad brush as, say, dandelions or Canadian thistle. I like to think of myself as an individual with a finely attuned sense of moral discrimination when it comes to weed classifications. Feeling the keen distinction between a broadleaf dandelion and a broadleaf clover, I found it mildly troublesome that I would be unable to indiscriminately dump several gallons of chemicals into my lawn to assassinate the former without molesting the latter. I had initially hoped that if I allowed the clover to grow tall enough it would crowd out the other more noxious varieties of broadleaf plants and obviate my dilemma, but alas! This was not the case. Dandelions are happy to grow as tall as need be to find the sun above whatever tries to shade them out. I would not be surprised to learn that somewhere in South America in the middle of the rainforest there are 60-foot dandelion stalks poking above the canopy.

The third great disadvantage of clover lawns is durability. Frankly, the stuff’s not built with children or wedding parties in mind. When it has leafed out, it gives the impression of thoroughly covering the ground, but in reality the stalks are not nearly so tightly packed as typical grass. A slip-n-slide placed on an area of clover for the afternoon with kids playing on it will result in a literal mud pit beneath the pool. An impromptu fencing match will tear out clover by the roots and leave interesting scars. Standing in the same place for too long results in a foot pattern which lasts a couple of days.

A fourth, somewhat lesser disadvantage of clover is that it is wet. If you let it grow too tall and then need to cut it, resulting in a quantity of clippings, then you must be careful how you dispose of them because they stink to high heaven as anaerobic decomposition sets in. I will not describe how I came to learn this, nor the experiences I had out on the “compost” pile trying to spread the noxious cuttings out far enough to dry them up. Suffice it to say that the “compost” pile is half an acre away from the back patio and after I figured out where that hideous stench was coming from, I prayed that prevailing breezes had kept the miasma away from my neighbors.

And so we came to late August, when the days are warm, the nights are cool, the backpack sprayer is in top form, and the idle rototiller thirsts for telluric carnage. One factual tidbit here is that I’d never before planted grass in the fall, despite everyone saying it is the best time to plant it. Having now done so, I can join the chorus, because I have never before seen grass grow as swiftly as mine did after I sprayed the whole clover lawn with glyphosate, rototilled it up, and planted grass in mid-September.

Several people have asked me whether, given the opportunity to start over, I would plant clover again. The answer is that of course I would do the experiment again, because I still think a pure clover lawn looks lovely. But knowing what I know now, would I recommend planting one? Absolutely not…unless you’re looking for a way to be an interesting person, in which case I won’t tell anyone you knew better beforehand.

Abstract dissent is not patriotism

I saw a bumper sticker today that said “Dissent is the highest form of patriotism.” The quote was attributed to Thomas Jefferson, which is apparently incorrect, but regardless, the sentiment betrays a rather delicious incoherence of thought. If mere dissent is the highest form of patriotism, then anarchy must be the highest form of government. The logical conclusion of consistent dissent is the dissolution of civil society as the true patriots find themselves continually warring against whatever faction happens to be in power.

Interestingly, I only seem to see these stickers pop up when some form of conservative government is in power. When a more liberal party reigns, I tend to see the “NOT MY PRESIDENT” stickers, which, though similarly false, at least stop short of proclaiming a self-defeating philosophy.

Creating complex shortcodes in WordPress

I occasionally dabble in custom WordPress themes on my wife’s behalf and in furtherance of her vast eBook empire. As part of her current theme, she wanted some shortcodes to do neat things like having a multi-column section of a blog post. That way, she can write:

[columns]
[column]First column here![/column]
[column]Second column here![/column]
[/columns]

instead of the actual mess of HTML and CSS required to make such magic happen. Plus, if we ever decide to change the markup we’re using to generate columns, we can just change the implementation of the shortcode instead of going and updating a whole bunch of blog posts. Cool feature!

Defining a shortcode

In your theme’s functions.php, you need to do (at minimum) two things:

  1. Create a function that replaces the shortcode with its actual content.
  2. Register your shortcode with WordPress.

This part is straightforward. Say we wanted to create a [contentbox] shortcode to automatically wrapped its contents into an <aside>. That could look something like:

We could use it this way:

[contentbox align="right"]Here's a nice right-aligned piece of content![/contentbox]

When included in a post, that would become:

<aside class='content-box right'>Here's a nice right-aligned piece of content!</aside>

(CSS to make it actually look like a box and aligned right is left as an exercise for the reader.)

The evil that lies within

There’s a problem. WordPress has an ancient, vile, and notorious function in place which is designed to make users’ lives easier and developers’ lives miserable. This function is called wpautop and I hate it passionately.

The idea behind wpautop is simple: convert all double linebreaks into paragraph elements, and tack on <br> tags to whatever’s left. This lets an average user type text into the editor and have it converted to HTML even without using WordPress’ visual editor. The problem is that wpautop doesn’t know anything about shortcodes, so if our user splits our shortcode into several lines (such as the [columns] example at the top of this post), wpautop comes through and sprays <br> tags everywhere. Incidentally, <br> stands for “break”, which is exactly what wpautop is designed to do to nice complex shortcodes.

This problem has been known for ages – it was reported at least 9 years ago as of this writing, was still allegedly being discussed by WordPress devs 7 months ago, and there is no fix. Ridiculous.

Rescuing the shortcodes

There are at least four ways to deal with the problem of wpautop murdering our shortcode content:

Option 1: Change do_shortcode filter priority

While loading a page, WordPress executes a long list of “filters”, which are just functions that operate on the post’s content. wpautop is one such filter, as is do_shortcode. The latter is what ends up calling our own custom shortcode functions, replacing the shortcodes with actual content in the post. In WordPress core, wpautop runs at priority 10 and do_shortcode runs after that, at 11. So one way to thwart wpautop is to change do_shortcode‘s priority to 9, meaning our shortcodes will be resolved first and hopefully wpautop won’t mangle the output too badly.

This isn’t a great solution because it can potentially break all kinds of other themes or plugins (which might rely on WordPress’ default filter order) in subtle ways. Until today, I was using this approach for my wife’s site theme, but then we started switching her shopping cart to WooCommerce and discovered that my hack broke the text on the “proceed to checkout” button (because wpautop vomited a <br> randomly into the button text).

So if you take this route, expect occasional oddities with other plugins. This is not a well-behaved solution.

Option 2: Disable wpautop entirely

I love this option because I hate wpautop. However, this will likely break even more themes/plugins than option 1, and also users may not get the expected results if they’re composing posts in the text editor without using a sensible text parser like Markdown. Still, if you want to do it, just put these two lines into functions.php:

remove_filter( ‘the_content’, ‘wpautop’ );
remove_filter( ‘the_excerpt’, ‘wpautop’ );

Option 3: Disable wpautop on a post-by-post basis

You can install a plugin to disable wpautop only on certain posts–in our case, the ones with shortcodes on it.

I like how the plugin description explains its existence by saying “Back in the day, when the wpautop filter was really sucky…” What, you mean like yesterday?

Option 4: Hide the shortcodes behind a false bookcase

Like squirreling away guns or hiding Jews from the Nazis, this approach pretends that shortcodes don’t exist until after wpautop runs. It’s the most complicated, but it’s probably also the best because it lets wpautop commit whatever debauchery it wants on the post and then puts our precious shortcodes back in place unmolested. There are two steps:

  1. Register a filter before wpautop to search the post content for any shortcodes and replace them with random strings.
  2. Register a filter after wpautop but before do_shortcode to switch out the random strings for the original shortcode text.

Easier said than done, because finding complex shortcodes is no walk in the park. Fortunately, I’ve done the hard work for you!

When included in your functions.php file, the above code will:

  1. Search for any shortcodes in your post/page content.
  2. Once a shortcode opening tag is found, attempt to locate its corresponding closing tag.
  3. Replace the entire shortcode contents in the post with a random string.
  4. After wpautop has run, replace the random strings with the original shortcode markup.

After that, do_shortcode should run and evaluate your shortcodes normally.

Review: Kingdom Builder

Time for a Kingdom Builder review! I bought this game several years ago after playing a friend’s copy. It’s a fairly lightweight game in the “area control” category, in that you place settlements onto the board to take control of

Rules

The rules of Kingdom Builder are very simple. Set up the game by selecting four interlocking board sections, each having a hexagon-based map with various terrain types on it. Then draw three public “objective” cards from a special deck and place them face-up near the board. These objectives define how points will be earned during the game – some objectives give you points for having settlements adjacent to water, or having the most settlements on a board, or having the biggest group of contiguous settlements, etc. Each player is then dealt a single terrain card (which just shows a terrain type), and you’re ready to go.

On a player’s turn, he reveals his terrain card and places 3 of his settlements onto the board, on terrain which matches his card. The catch is that the player must play adjacent to one of his existing settlements if possible. (If he has no settlements adjacent to his terrain type, then he can play settlements onto that terrain anywhere on the board.) The player then draws a replacement card and his turn is over.

There are certain special spaces on the board which provide an action tile to players with settlements adjacent to the space. These action tiles can be used one per turn before or after a player places settlements, and they let the player do things like move an existing settlement on the board or placing a new settlement with some restriction (e.g. only on the edge of the board, or only on grassland, etc.).

Opinion: Positives

  • The game is simple without being silly. The rules are quick to teach and easy to pick up, but there are strategic nuances which only become clear after several plays. Due to the rule which forces you to play adjacent to your existing settlements, the game is often as much about where not to place your settlement as where to place it (thereby keeping options open for later turns).
  • It doesn’t overstay its welcome. Playing time is typically under half an hour, which feels about right for the game.
  • Replayability is great. You can swap out boards to change the map each time, and each board has different special action tiles on it. Additionally, the victory conditions themselves (that is, how to score points) change with every game, preventing players from falling into a single “optimal” strategy rut.
  • It’s kid-friendly in a Carcassonne-style fashion. Having just one card in your hand, similar to Carcassonne’s single tile, limits analysis paralysis and helps move the game along.

Opinion: Negatives

  • Randomness can be frustrating. Apart from the special action tiles, you can only play settlements onto the terrain type of the card you drew…so if you don’t draw the right terrain type for several turns in a row, your plan can be held up or even ruined by other players who play onto your desired spaces first. This can certainly be mitigated by careful play and the special action tiles do help, but there are times when you’ll be frustrated at the single card draw.
  • It’s easy to accidentally cheat. As the game progresses, it’s sometimes easy to miss the fact that a player is adjacent to a terrain type somewhere on the board. Plus, with special action tiles to account for, this game demands player attention in surprising ways – especially when playing with children.

Conclusion

I consider Kingdom Builder to be comparable to Carcassonne, even though the core gameplay is very different. Both games have a single-draw-defines-your-turn mechanic, and both are comparable in approachability, complexity, and the luck-of-the-draw aspect. Carcassonne has the potential to be much more cutthroat (depending on your game group), and Kingdom Builder has simpler rules (no complicated farmer scoring to deal with) as well as more variety of play thanks to its changing victory conditions. Both games can sometimes have brain-burning turns as you try to figure out where the “optimal” play is and decide how much you want to push your luck in terms of future draws.

I enjoy Kingdom Builder and I think it’s a solid game design, but it probably wouldn’t stay in my collection if I didn’t have younger kids to play with. I like pulling it out with kids or as an easy-to-teach game with dinner guests, but it doesn’t have enough depth to really stand out among the other games in the closet. I would rarely if ever suggest it with experienced strategy gamers.

The verdict: a qualified thumbs-up!

Review: 7 Wonders

7 Wonders is an approachable, mid- to light-weight card-drafting game. What does this mean? Read on!

Rules

The game is played over the course of three “ages”. In each age, players are dealt a hand of 7 cards. The players then simultaneously choose a card from their hand, reveals the selected card at the same time as everyone else, pays the costs (if any), and plays the card on their personal tableau in front of them. Players then pass their hand of cards to a neighbor and repeat the process until there are no more cards.

Many cards have resource requirements a player must meet in order to play them. These resources can be generated from the player’s civilization (consisting of cards he has already played in front of him), or players can buy resources from their immediate neighbors (players to the left and right) – provided those neighbors actually produced the desired resources. Some cards, thematically represented as trading posts, reduce the cost of buying such resources from neighbors.

Some cards can be played for free if the player has already played the necessary prerequisite card in a previous age. (For example, playing an Altar in the first age would let you play the Temple in the second age for free instead of paying its resource cost, and the Temple in turn would let you play the Pantheon in the third age for free – each of these being worth progressively more points.) In this way, the game rewards players for following a long-term strategy.

There are also cards which provide military strength. At the end of each age, players compare their military strength with that of their immediate neighbors. The winner gains a number of points (1 point in the first age, 3 in the second, and 5 in the third), whereas the loser loses just 1 point regardless of the age.

Instead of playing a card face-up for its benefits, players can also choose to draft a card and play it face-down as a stage of their wonder. In doing so, the player ignores the cost on the card and instead pays the cost shown on his player board. Each civilization’s board is different, and each stage of a wonder provides some benefit to the player. Most offer victory points at the end of the game, but many also provide other benefits during the game, such as resources, military strength, the ability to play a card for free, and so on.

Opinion: The Positives

There are a number of things we like about 7 Wonders:

  • The game is easily taught to new players yet also has strategic depth for experienced players. This is a game that even “non-gamers” can pick up and enjoy on the first playthrough.
  • There are a good number of decisions for the short playtime. Typical games in our group take 30-45 minutes, and while this is by no means a brain-burner, there are a lot of opportunities for meaningful decisions. To excel at 7 Wonders requires both tactical thinking (reacting to which cards are available in your hand to draft) as well as strategic direction, because certain paths to victory reward long-term commitment. For instance, science cards (of which there are three types) are scored in two ways: the number of science cards of the same type squared (so 4 “gear icon” science cards gets you 16 points) as well as 7 points for each set of all three science icons you have. This can add up to the bulk of your score, so it pays to be thinking and planning ahead even from the beginning of the game.
  • Player interaction is balanced. The three main ways to interact with other players in 7 Wonders are buying resources, fighting militarily, and of course the card drafting itself. The nice twist to this game is that the negative side effects of interaction are minimized. In the case of trading, buying a resource from another player does not prevent him from using that same resource in the same turn. (Thematically, this makes no sense, but it works very well in the game.) For military defeats, the losing player does lose a point but that’s usually a fairly minor setback over the course of the game. This is by no means a “take-that” kind of game, but it’s also very important to pay attention to your neighbors and which cards you’re passing along for them to draft.
  • The game is friendly to parents of young kids. That is to say, 7 Wonders is easy to momentarily pause and resume if a child needs attention, because the game state is always clear and it doesn’t require a lot of mental immersion.
  • Most games end up fairly close, and it’s not always obvious who will win. Ocassionally we do see a runaway victory with one player winning by 20 points, but that is rare. On more than one occasion, our 4 players have had a total point spread of only 5 or less.
  • The game scales well to multiple player counts. I don’t recommend it as a 2-player game (though a variant exists), but for all other players it scales well – you add or remove cards from the age decks based on the number of players.

Opinion: The Negatives

  • A few of the wonders’ special ability icons are obtuse. There are two or three icons on certain wonders which we virtually always have to look up in the rulebook. Once we look up the rule to find out what the ability is, we can look at the icon and say “oh, yeah…I see why they came up with that picture”, but it’s not intuitive. (I’m looking at you, play-from-the-discard-pile and play-a-card-for-free abilities!) However, most of the iconography is excellent and this is a minor flaw.

I have a hard time coming up with negatives for 7 Wonders based on what it is. If you don’t enjoy card drafting, you won’t like this game. If you want direct take-that player interaction, this isn’t the game for you. If you want a heavy, meaty, strategic game, look elsewhere.

Conclusion

This game neatly fills a niche of having a game that’s teachable in a single play yet has enough depth to keep strategic gamers interested and involved. Thanks to the short playtime, it’s also rare this one gets only a single play once we pull it out of the closet.

7 Wonders gets a solid thumbs-up from the Winckler household!

Review: Dominion: Intrigue

Dominion is a widely popular “deckbuilding” card game, so named because the fundamental game mechanic is choosing cards to put into your deck and then playing them. It captures a taste of the deckbuilding of “trading card games” (TCGs) or “collectible card games” (CCGs) such as Magic: The Gathering while being self-contained in a single box, playable in 30 minutes flat, and affordable without a second mortgage. (Dominion involves no booster packs or anything of the sort; it’s a self-contained box game albeit with expansions available.)

The premise is simple: in each game of Dominion, there are 10 (randomized) actions available to put into your deck, three kinds of “treasure” (used for buying other cards), and three kinds of victory point cards (which are the only cards that matter when figuring out who won the game at the end, but until the end of the game they are dead weight in your deck). On your turn, you can play one action card and then spend treasure cards to buy one new card. As the game progresses, your deck becomes larger with (hopefully) better cards and you are able to buy more expensive actions, treasure, or victory cards.

I’ve played Dominion probably a couple dozen times, but it was only just recently that I discovered I’ve been playing it wrong all along. My wife and I would usually buy a bunch of actions, trying to get synergy between them and neat combos. Sometimes my wife would cycle through practically her whole deck, drawing cards and getting more actions and chaining things together. Then recently we had some friends over to play Dominion and one of them, ostensibly because she couldn’t choose from all the many actions available, bought nothing but treasure and then bought the expensive “Province” victory cards which gain the most points whenever she could afford it. In this way, she utterly destroyed the rest of us – the game wasn’t even close.

After that startling experience, I wondered if it was just a freak occurrence or if there was something to this strategy so I decided to try it out against my wife. I even told her ahead of time exactly what I was going to do so that she could effectively counter it. So for four games straight, I bought nothing but treasure (and maybe one action card), bought a Province whenever I could afford it, and won handily every single time. These massacres took maybe 15 to 20 minutes compared to our 45-minute average before the epiphany.

At that point we both wondered whether there was something broken about the game, and I went hunting for tips online. That’s when I discovered that apparently only noobs play Dominion the way we previously did. Supposedly there are three stages to Dominion players:

  1. Look at all the shiny action cards! Buy them all!
  2. Wait…buying nothing but money, provinces, and the occasional duchy always beats the action cards! (Also known as “big money” strategy.)
  3. “Big money” plus one good action card beats “big money”!

We never progressed beyond stage 1, and Dominion was certainly not on my list of favorite games. I was always willing to play it, but I’d virtually never suggest it because games just dragged on – I thought the 30 minute playing time on the box was a joke (like most playtime estimates on board game boxes).

I was afraid that “big money” might ruin Dominion for us, but I actually like the game better now. Shiny-action mode simply takes too long to play and the game outstays its welcome. Big money is snappy and makes you think hard about which actions you’re going to add, also reacting tightly to what your opponent does. I almost wish the rulebook would include guidance, something along the lines of “hey, I know all these actions look great and fun and all, but really you should completely ignore them and just buy money and provinces until you know what you’re doing. Trust me.”

Dominion: Intrigue is a standalone expansion which you can play with the base game or by itself. I like Intrigue better than the original because it has more interesting possibilities for player interaction, but with that said, I haven’t yet replayed the original since having the big money epiphany.

All flavors of Dominion remain in good standing among our household.

Verdict: Thumbs up!

The 10×10 Hardcore Challenge

On January 2d of this year I committed myself (and, incidentally, those who are unfortunate enough to play board games with me) to a “10×10 hardcore challenge”. This was an idea I saw on BoardGameGeek, and as our gaming had waned somewhat, I thought it would be a good way to motivate us to make it more of a priority again. This proved true, and I successfully completed the challenge last Saturday on November 19th.

As a side note, gaming is like many other enjoyable things in that the more you do it, the more you want to do it. Once you are in the habit of doing a thing, it becomes much easier to continue doing it. There are likely useful life lessons to be drawn from this, but I will refrain from doing so here.

The games we played were:

One of the interesting things arising from the challenge is that prior to this, we would rarely play a game more than a few times in a row. Nothing about the challenge technically compelled us to play the same game all in a row, but in several cases (notably Wiz-War, Eclipse, XCOM, and Quantum) we did just that (over the course of weeks/months). This had the effect of revealing strategies in gameplay or even virtues of the game which would not otherwise have been apparent. In particular, I was not originally a fan of Quantum, but I recognized it had enough merit to make it worth trying out. It wasn’t until the sixth or seventh play that I discovered some additional strategic depth beyond that which was immediately apparent (to me, at least). I don’t think this means I’ll be inclined to give every game almost a dozen plays before passing judgement, but I certainly will be more open to diving into repeated plays of a game rather than sampling one of everything from the game closet buffet.

As the challenge progressed, we discussed whether each game was good enough to remain in the collection. A couple of games we had never (or hardly) played before the challenge – XCOM and Mage Knight. Quantum also only had a couple of plays before the challenge. Some I feared might fall apart after repeated play – such as Kingdom Builder.

Ultimately, only one board game definitely got booted from the collection following the challenge, and although I was firm enough in my resolve that I didn’t need any confirmation from my gaming colleagues, I think the decision was unanimous. But rather than simply spoil the surprise right here, I decided to take the effort to write a review of each of these games individually. Look for them in the coming posts!

As for whether I’ll do another challenge – I doubt it. Or at least, I won’t do another hardcore challenge where I pick all the games of the year ahead of time. I still think there’s some value to picking a game and saying “we’re going to commit to playing this X number of times unless we end up completely hating it”. Some games take some time to shine, and you may be surprised at the depth (or occasionally lack of depth) you discover if you play a game repeatedly within a short period of time.

Re-employed

If this blog is a record of my grand exploits, then it seems appropriate to note, in the interest of continuity, that about a month ago I accepted a job offer and am once more gainfully employed as a professional software developer. Assorted experiences of the past have taught me the prudence of maintaining the separation of work and blog, so that’s about all I shall express upon the topic, aside from praising God and rejoicing that I am again in a position to earn my keep from the comfort of my home office.

As I observed at the time, unemployment would be practically an ideal state of affairs if only one wasn’t continually feeling the pesky pangs of material want. After all, such a condition leaves one with plenty of time for the important pursuits, such as writing blog posts. However, life and sustenance being what they are, I am (on the whole) glad to once more have my daylight hours occupied in more fruitful pursuits.

That said, there are a few projects I have underway, and as the saying goes, though they proceedeth slowly, they are exceedingly fine.

The first such endeavor is a new WordPress theme for my wife’s blogs. This theme, which I believe the gracious call “minimalist”, is now live on her various and divers sites. She says she likes it and that it’s better than her previous themes (which I also authored). I’m not sure I agree, but if you do, it’s free for the taking.

The next project on the docket is an effort to sanitize the computer game World in Conflict of profanity so that my younger boys can play it. Happily, the developers were very mod-friendly and made a mod kit available in the day. Unhappily, that day was quite a while ago and it’s been a struggle just scraping together the tools from various corners of the Internet to make modding possible. However, I’ve now reached the point where I’m able to edit everything except cutscene movies, and it’s just a matter of doing the grunt work of finding the particular files which need editing and doing the editing itself. (By the way, I am here intentionally ignoring the debate about whether such “censorship” as this is worthwhile or a total waste of time. Assuming I get anywhere with the project, I’ll eventually be writing my thoughts on the matter in more detail.)

Third on the list is the construction of dice towers. Some years ago I invested in a number of Hirst Arts molds. Shortly after purchasing them, I cast a whole bunch of little plaster bricks and built a few neat things. And then they (along with a number of the bricks and some 70 pounds of Hydrostone) sat in my garage collecting dust. This really is quite inexcusable, but unfortunately it is the truth. I am now doing my best to atone for this neglect by pulling the various pieces out of storage and designing dice towers. Dice towers (of which I presently have an embarrassing shortage) are important to me right now because of the next project, which is…

Fourth: playing 100 board games over the course of 2016. I’ve signed up for a 10×10 challenge on BoardGameGeek, meaning that I intend to play 10 particular games 10 times each during the year. We didn’t play nearly enough board games in 2015, and I think this kind of challenge is just the sort of thing to change that. At a mere two games per week it doesn’t sound like much, but it’ll be a good deal more than before. Plus, although some of the games I chose (Dominion, Kingdom Builder) can easily be played a couple times in an evening, others (Eclipse, Mage Knight) are rather involved.

Of course, the final project on the list is blogging itself. I’m out of practice, and writing is a thing that wants continual exercise.

Speaking of continual exercise, I suppose that’s a sixth project. But I mean to say, really, you know, one wouldn’t want to be overwhelmed with projects.